With the compact HS-X1000, 4K Ultra HD* video is created with a 4K 8-MP 1/2.3-inch BSI sensor. Compared with the 2-MP sensors used in ordinary Full-HD camcorders, this distinct sensor advantage renders UHD and FHD professional-quality results. Right down to the finest details, and with minimal blurring.
If you recorded 4K and 1080P footage via Panasonic HC-X1000, you may plan to import and edit Panasonic HC-X1000 recordings on Mac via Final Cut Pro. But Final Cut Pro doen’t supported MPEG-4 AVC/H.264 well, for importing and editing Panasonic HC-X files in FCP X smoothly, you can convert AVCHD/MOV/MP4 to FCP editable video format. This post presents how to convert AVCHD/MOV/MP4 video files taken with a Panasonic HC-X1000 for smooth editing on Mac FCP X.
In 4K 60p resolution, the mobile X1000 captures stunning, lifelike images. Using 60p/50p, the frame rate has twice the information of 30p for smoother motion. If you’re ready for 4K, this is how you do it. It’s fantastic to record incredible Full HD videos with such a tiny camera, but it may be a pain when you tried to edit Panasonic HC-X1000 footage on a Mac through Final Cut Pro X. What to do? Convert them first! That’s where HD Video Converter for Mac comes in.
Read user reviews on HD Video Converter for Mac
“Your HD video converter for mac is very great. I have used it a lot and recommended it to friends. One of the things I like that it is really easy to use for a novice. Playing back on my Macbook went just fine. Thank you very much.” – John Knippenberg
“Your conversion program is working fine. I like the varied formats to convert to and its quality of outputs. Great GUI, very easy to use. I doubt it before using, but conversion speed is effectively faster than other tools when used with dual core processors. Congratulations. You’ve got a winner of a video conversion solution.” – Paul Rieder
“I LOVE, LOVE, LOVE this software! It is extremely user friendly. I recently shot some video files using a Sony Handycam for my elementary choir performance and it was so easy to convert the movie clips using the software and incorporating them into iMovie. All I can say is WOW and THANKS so much!! It was worth every penny!!!” – Daniel Fumaria
Download a demo of Panasonic HC-X1000 to FCP X Converter


How to convert HC-X1000 AVCHD/MOV/MP4 files for editing in FCP X?
Before we start, you may want to know more about the Panasonic HC-X1000 video converter.
Working as a Panasonic AVCHD/MOV/MP4 Converter for Mac, the HD Video Converter is able to convert Panasonic HC-X1000 footage to ProRes encoded MOV files for use in FCP (FCP X, FCP 7, FCP 6) fluidly with lossless quality. If you like, you can convert Panasonic HC-X1000 recordings to any video format on Mac and Windows via Panasonic Video Converter. You can follow the step-by-step guide below to process format conversion.
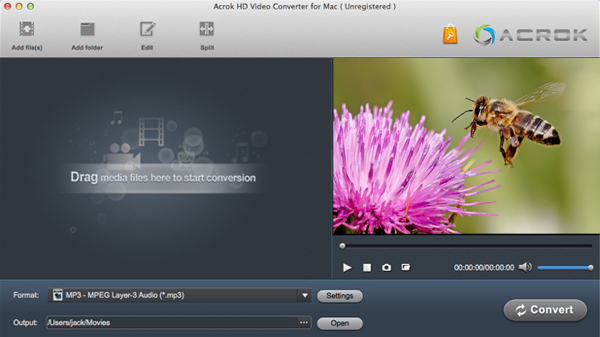
Step 1: Add video
Open up HD Video Converter for Mac as Panasonic HC-X1000 Video Converter for Mac. When its main interface comes up, click “Add File” to load Panasonic HC-X1000 4K and 1080P videos.
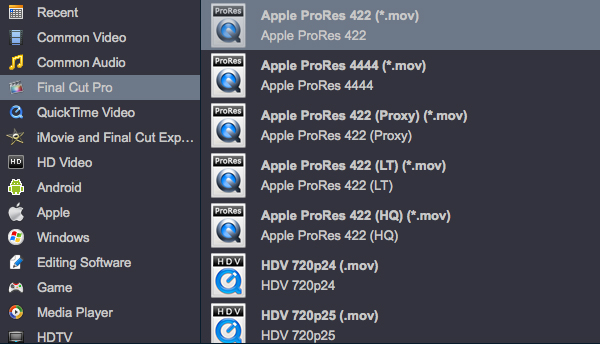
Step 2: Select output format
To convert Panasonic HC-X1000 AVCHD/MOV/MP4 video for FCP X, from “Format” list, choose “Apple ProRes 422 (*.mov)’ as output format under “Final Cut Pro” column.
To transcode Panasonic HC-X1000 AVCHD/MOV/MP4 files for Premiere Pro, select “WMV” as output format under “Editing Software” column. The Premiere Pro progile is also workable in its former version CC and CS6. If you want to edit Panasonic HC-X1000 video in Sony Vegas Pro, you can get Sony Vegas Pro profiles in Editing Software category easily.
Step 3: Custom video and audio settings (optional)
If necessary, you can click ‘Settings’ button and go to ‘Profiles Settings’ panel to modify video and audio settings like video encoder, resolution, video bit rate, frame rate, aspect ratio, audio encoder, sample rate, audio bit rate, and audio channels. 3D settings are also available.
Step 4: Start Video Conversion
When ready, click “Convert” to start format conversion. Once the conversion process is complete, you can click “Open” button to get the generated ProRes MOV files for editing in FCP X freely and smoothly.

No responses yet