Panasonic P2 camcorders are professional camcorders records videos in HD MXF. P2 camcorders support a large number of SD and HD video formats at various frame rates, saving any recorded material to memory cards instead of having internal parts that move, such as a hard disk drive or a DVD disc. With the capability of resisting to high temperatures, shocks and vibration, P2 camcorders can capture the fast movement of the game and stay clear if you need to move around the field to capture the entire game while filming, which make P2 ideal professional camcorder to shoots fast motion, especially spots.
P2 MXF format is a typical MXF type with each track of video and audio are stored in separate files. The P2 adopts a 6-character identifier in the filename of all related files. To manage your P2 MXF contents, you must ensure that related tracks are kept together when P2 MXF clips are moved or copied.
“The talent show within our company was astounding. It was a huge success and everyone had a great time. The only weak link in our production however, was the videographer. Although he obtained some good footage of the event, it was handed to us on a hard drive as just raw P2 MXF files; no editing, no conversion, nothing watchable on any system in the entire company.”
My suggestion is to convert raw P2 MXF files to QuickTime for Mac.
Acrok MXF Converter for Mac, an intuitive and user friendly camcorder format converter can fast convert/batch convert MXF files to QuickTime on Mac, including the latest Mac OS X 10.9 Mavericks.


How to convert Panasonic P2 MXF for QuickTime on Mac?
Step1: Add MXF files to this bes MXF Converter for Mac
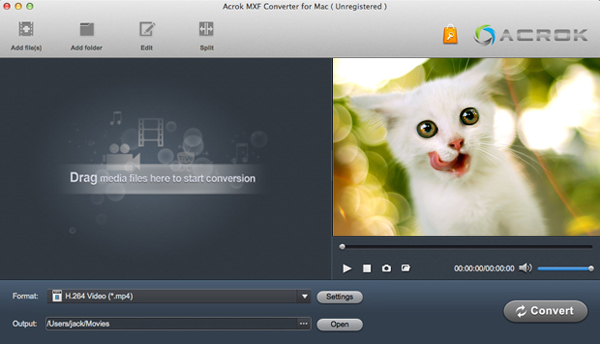
Import MXF file to this mac camcorder video converter. Click “add video or drag and drop MXF material into file area directly.
Tip: You shouldn’t move the separate P2 MXF video out of the whole MXF structure folder, or the MXF video would be wrong without audio.
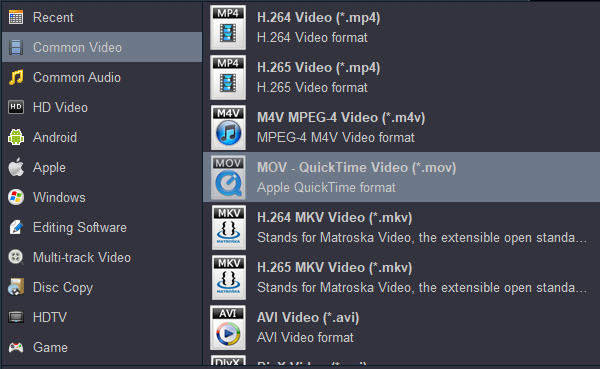
Step 2: Choose appropriate MOV format
Click the “Format” option in the main interface of MXF to MOV Converter, choose Common Video > MOV – QuickTime (*.mov) as output format.
Step 3: Set audio and video profile
Before you copy P2 MXF footage to QuickTime format, you can set profile via clicking “setting” icon.
Under the options of QuickTime MOV, the video frame rate is up to 60fps to keep high quality needs for playback in QuickTime.
Tip: The video resolution and video quality is extremely depends on your source P2 MXF file.
Step 4: Click “Convert” icon to convert P2 MXF video to QuickTime MOV
After P2 MXF video to QuickTime MOV conversion completed, you can click “Open output folder” icon to locate the output MOV video.
For HD Video Converter takes bridge effect of initial MXF conversion, you can freely enjoy HD MXF videos in QuikTime.


No responses yet